Choose a scope
Tap a scope’s title to change it or choose Off. Use an Add scope menu above the plots to fill an empty position. Up to four scope positions are available.

Show scopes (both familiar & new) for DaVinci Resolve using a tablet, phone, laptop or any display with a browser connected to your network.
This release requires macOS 27 or later. You need DaVinci Resolve on a Mac, a recent web browser, and a shared local network. GTap is the Resolve effect that sends the picture to Galaxy Scopez. Nothing needs installing on your phone or tablet.
Use GS → Stop Server to stop serving scopes, and Start Server to start again. Quit Galaxy Scopez stops the server and closes the menu-bar app until you open it again or next log in. To reopen it, launch Galaxy Scopez from Applications. Show Log opens the server log.
The universal installer supports Apple silicon and Intel Macs. It is signed with Developer ID and notarised by Apple, with the notarisation ticket attached for offline verification. Allow local network access if macOS asks, otherwise this will not work.
To update, quit Resolve, stop the old host and run the new installer. Then reopen Resolve. Saved viewer settings stay in the browser when you use the same address.
To remove Galaxy Scopez, quit Resolve and choose GS → Quit Galaxy Scopez. Delete /Library/LaunchAgents/com.vidarandersen.ghettoscopez.plist, /Applications/Galaxy Scopez.app and /Library/OFX/Plugins/SignalLabTap.ofx.bundle, then log out and back in. macOS may ask for your administrator password.
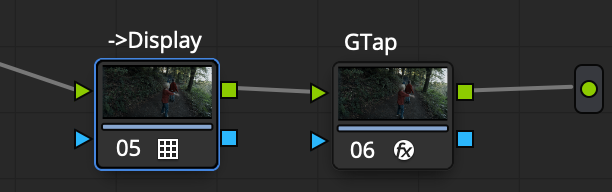
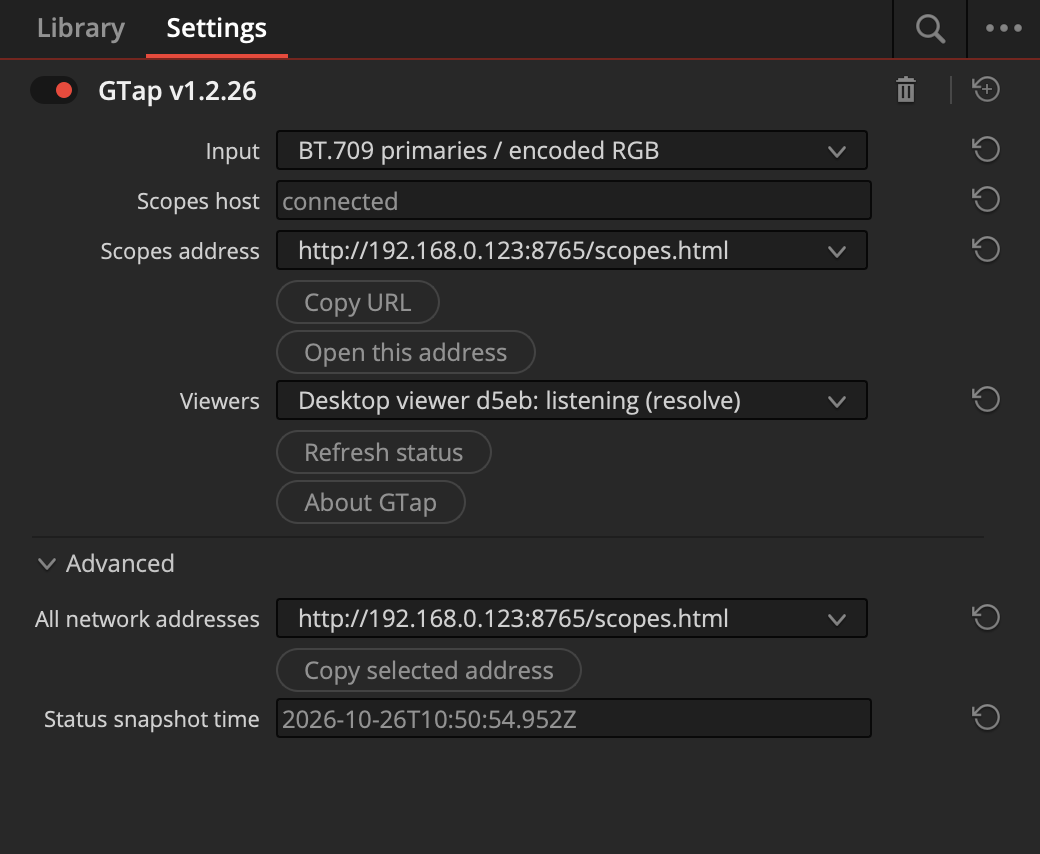
The scopes measure the image at GTap’s node. Choose the input declaration and level range to match that image.
Place GTap at the point in your grade you want to measure, before the display transform. In GTap’s Input menu, choose Source / working-space RGB — no transform.
The scopes read the float32 RGB values supplied to GTap. Negative values and values above 1 are retained; widen the measurement level range in Settings to see them. RGB parade, histograms, DoubleD and the colour cube use these raw values.
The working-space notice identifies this mode. Waveform and tonal splits use weighted RGB with fixed BT.709 coefficients; vectors use the corresponding RGB differences. These are numerical views, not calibrated working-space luma or display chroma. Display targets and the skin-tone guide are hidden, and axes show float values. Preview and trace colours are raw visualisations without a display transform.
This option does not detect or convert your project’s primaries, gamma or log encoding. To measure a display conversion instead, put GTap after that conversion and choose the matching encoded BT.709 or BT.2020 option.
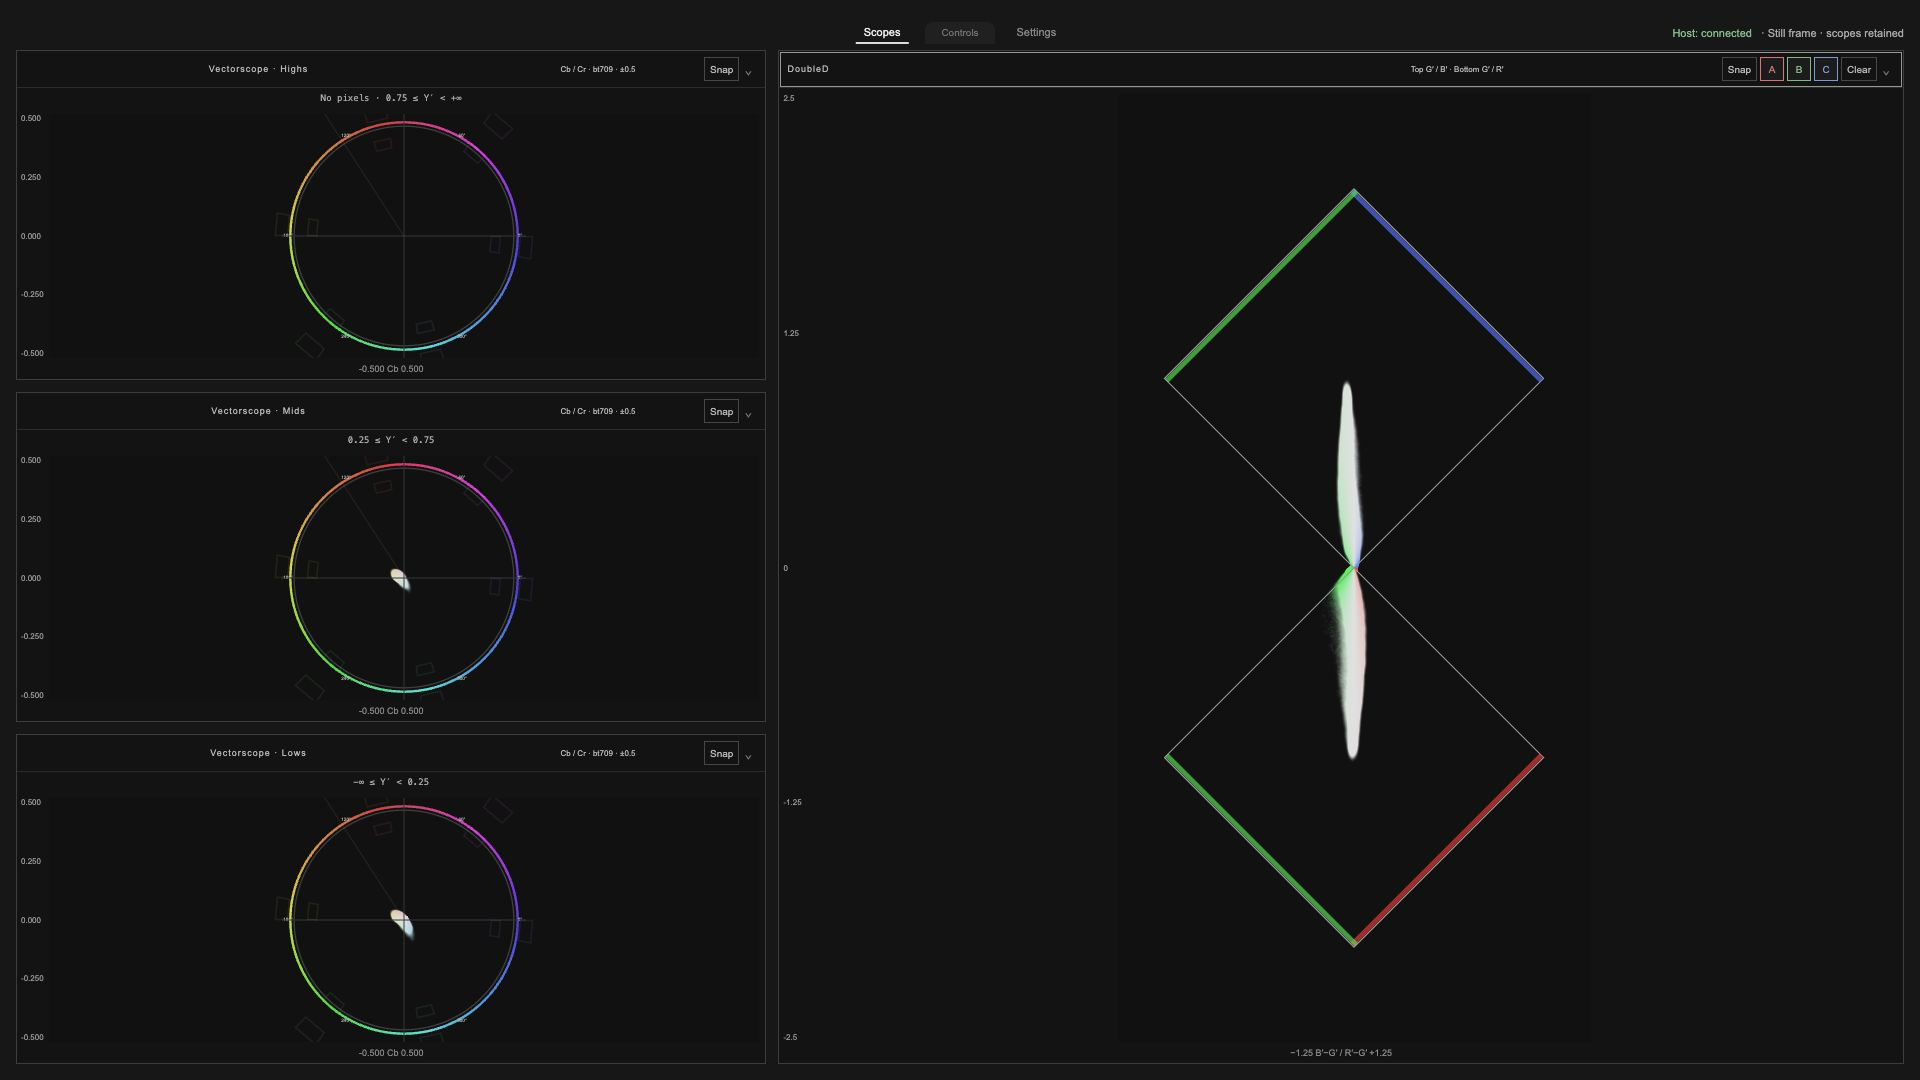
Tap a scope’s title to change it or choose Off. Use an Add scope menu above the plots to fill an empty position. Up to four scope positions are available.
Open Settings to choose Single scope, Two scopes side by side, a balanced grid, a row, a stack or a group beside the main scope. The two-scope layout gives both plots equal space. If all scopes are off, tap Choose layout in the middle of the screen. On a phone in portrait, a single scope or vertical stack gives each plot more room.
Tap Controls to reveal listening, trace and overlay controls. The popup fades after a short idle period; tap Controls again to reopen it.
Tap Fullscreen for more space. Availability depends on the browser.
Gain brings faint trace detail forward. Brightness changes how bright the trace looks. These controls change the display, not your grade. Colour and smoothing options let you choose the trace appearance.

Use pinch or the mouse wheel on supported plots to zoom. Use Reset to return to the starting view. Vectorscope magnification enlarges the trace while reference markings stay in place.
Detail Level changes trace detail independently of zoom. Cycle Q1–Q4 beside the zoom button in Controls, or choose Detail Level in Settings. Higher settings reveal finer detail but can be more demanding on your Mac and viewing device. Lowering Q does not crop the image.
Smooth softens trace detail in every scope. Histogram smoothing follows the value axis, hue smoothing wraps around the colour wheel, and the colour cube uses soft point edges. Scope measurements and source pixels remain unchanged.
The host indicator tells you whether the viewer is connected. The frame status tells you whether fresh data is arriving. A paused image can stay on screen while you compare or grade it.
The highlight and shadow boundaries can be adjusted in Settings.
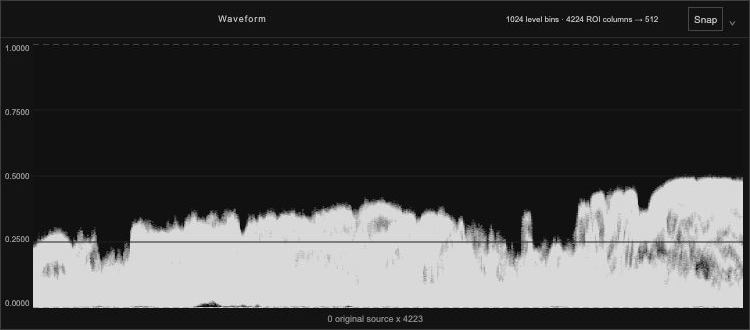
Shows levels from the left to the right of your image. Higher marks mean higher signal levels. Choose a plain trace, source colours or false colours by level.
For BT.2020 PQ footage, tap after the PQ output transform and choose BT.2020 primaries / encoded RGB in GTap. In Settings → Waveform, turn on PQ luminance (nits). This assumes the incoming signal is PQ, so leave it off for SDR, HLG and log footage. The waveform shows the luminance encoded in the signal on a scale that gives more room to darker values. For PAS highlight or shadow warnings, select an RGB scope or return to the encoded waveform.
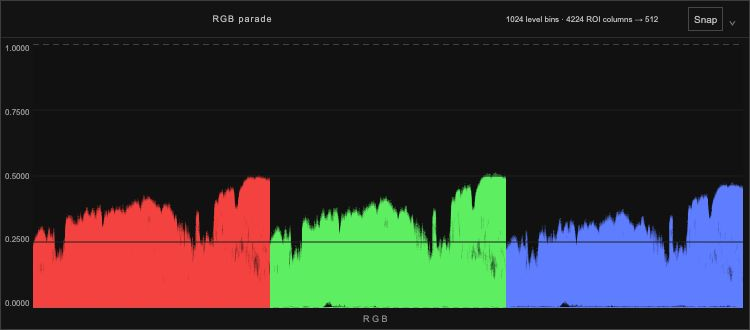
Shows red, green and blue levels side by side. Compare the channels to spot colour casts and differences in their high and low levels.
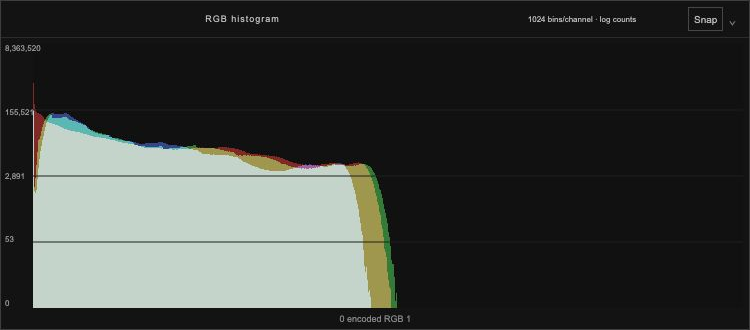
Shows how many pixels sit at each channel level. Choose overlaid channels, separate channels or a single colour channel.
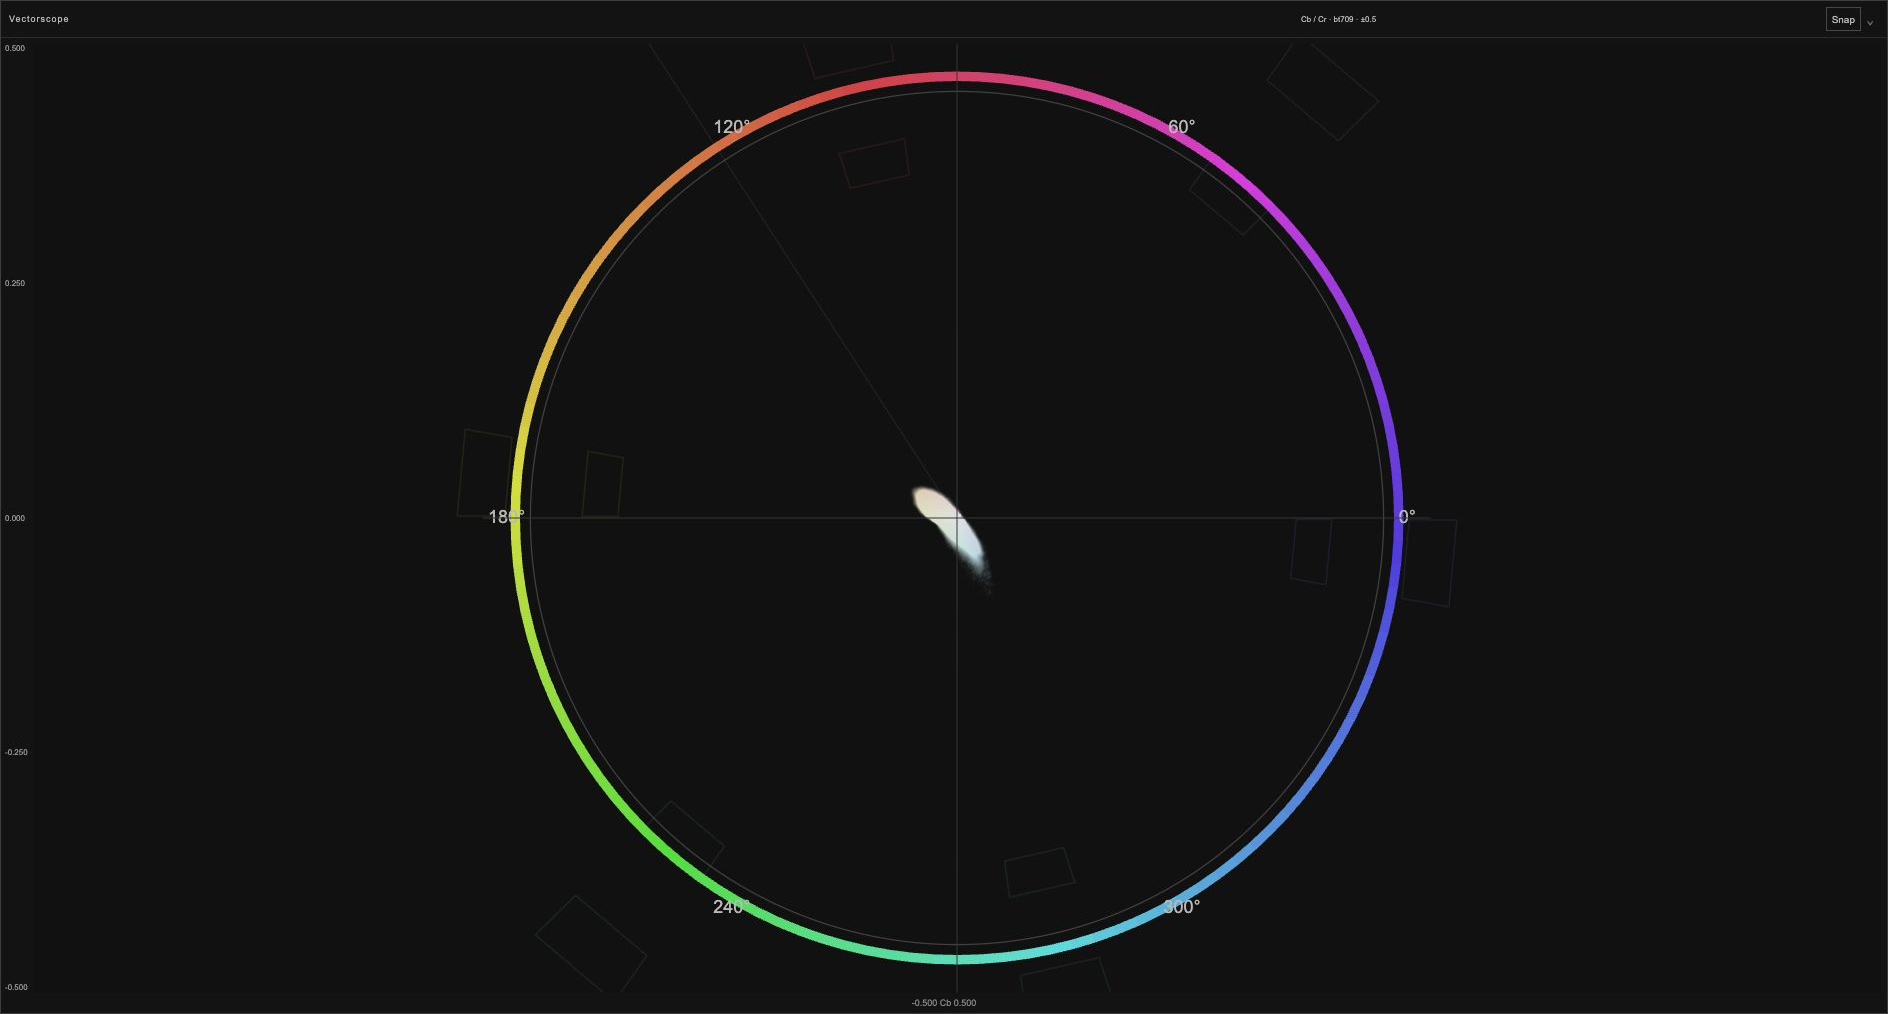
Show colour direction and strength. Marks near the centre are less colourful; marks farther out are more colourful. Choose the full image, highlights, midtones, shadows or a combined highs/mids/lows strip. The outer hue ring shows chroma direction in degrees, with 0° on the positive Cb axis. It is on by default. Turn it off under Settings → Vectorscopes → Hue ring. This also hides the ring in PAS and OG Synth. It stays fixed when you zoom the trace and is hidden for raw working-space RGB. The 75% and 100% colour-bar target boxes cover ±5° in hue and ±5% in chroma amplitude around each reference.
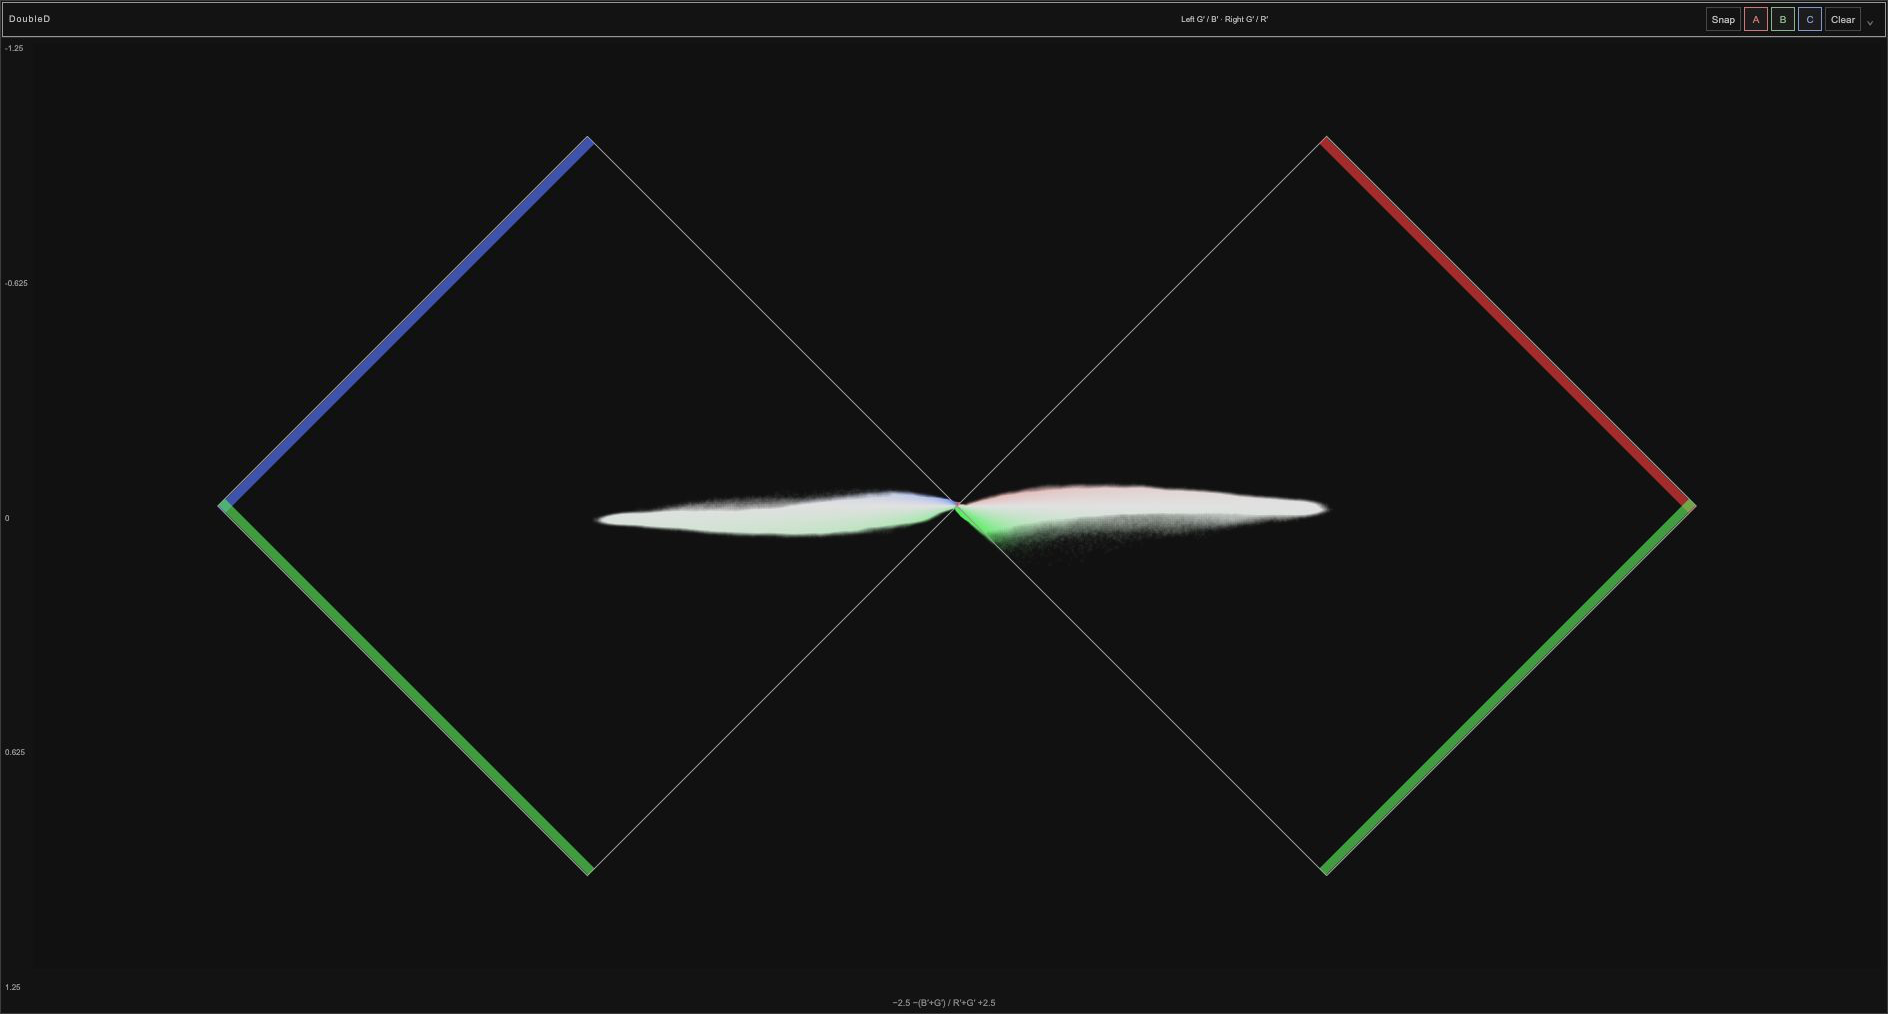
Shows colour balance across image levels in two related plots. Choose a vertical or horizontal orientation. Colour guides remain visible even with a plain trace; the neutral axis is optional.
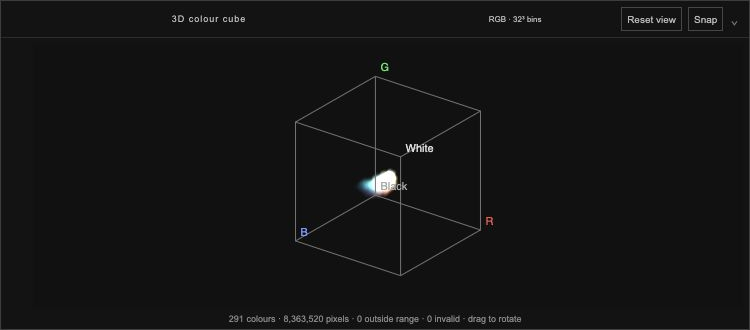
Shows the spread of RGB colours in a cube. Drag with a mouse or finger to rotate it, pinch or scroll to zoom, and use Reset to restore the view.
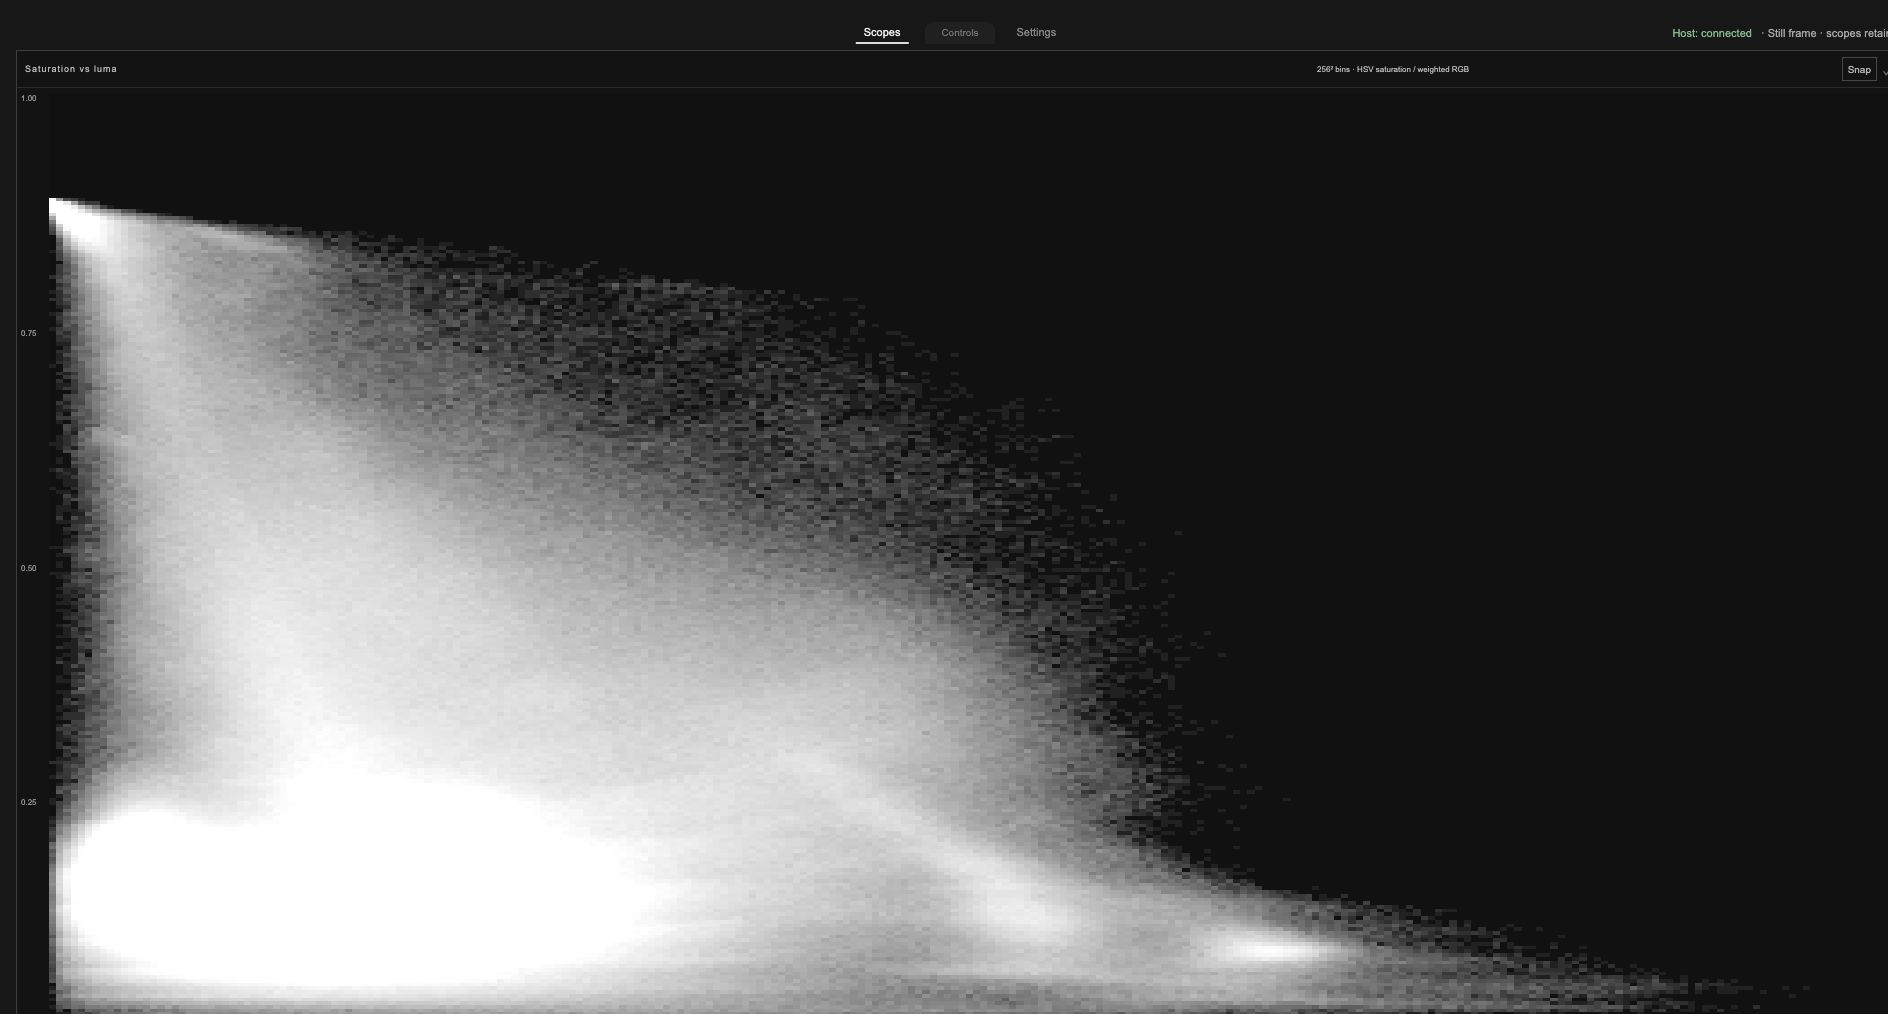
Shows colour strength from left to right and encoded luma from bottom to top. Use it to see whether stronger colours sit in darker or brighter parts of the image.
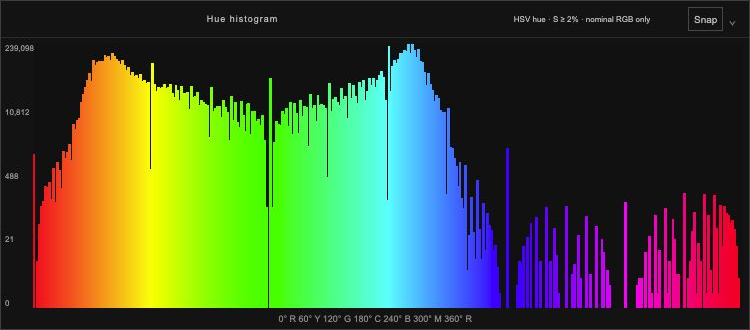
Shows which hues are present and how strongly they contribute. Choose All colours, Near-neutral, Shadows or Highlights to look for subtle casts or compare colour across brightness ranges. Set up the hue histogram.
Tired of just talking about parking those levels all day long? Now you can actually park your grade like you park your car! Hear audible warnings when highlights, shadows or saturation approach your chosen limits. Turn PAS on in controls, toggle on and off in the active scope.
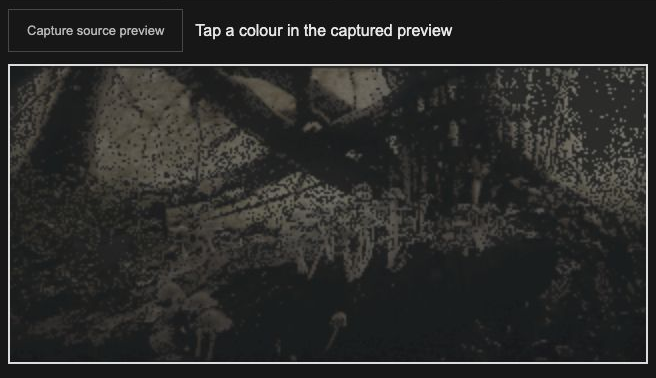
Pick a colour from the source preview and narrow the range to see how it reads on the scopes. Set up colour isolation.

Across a trillion blazing galaxies, the intergalactic Prince of the Universe and his neon tiger seek diamonds beyond counting. Empires tremble. Stars bow. Fabulous destiny awaits. Of course you always wanted to use the Resolve color grading tools as a game controller to play games - INSIDE OF RESOLVE - so here's the answer to what you've been yearning for all these years.
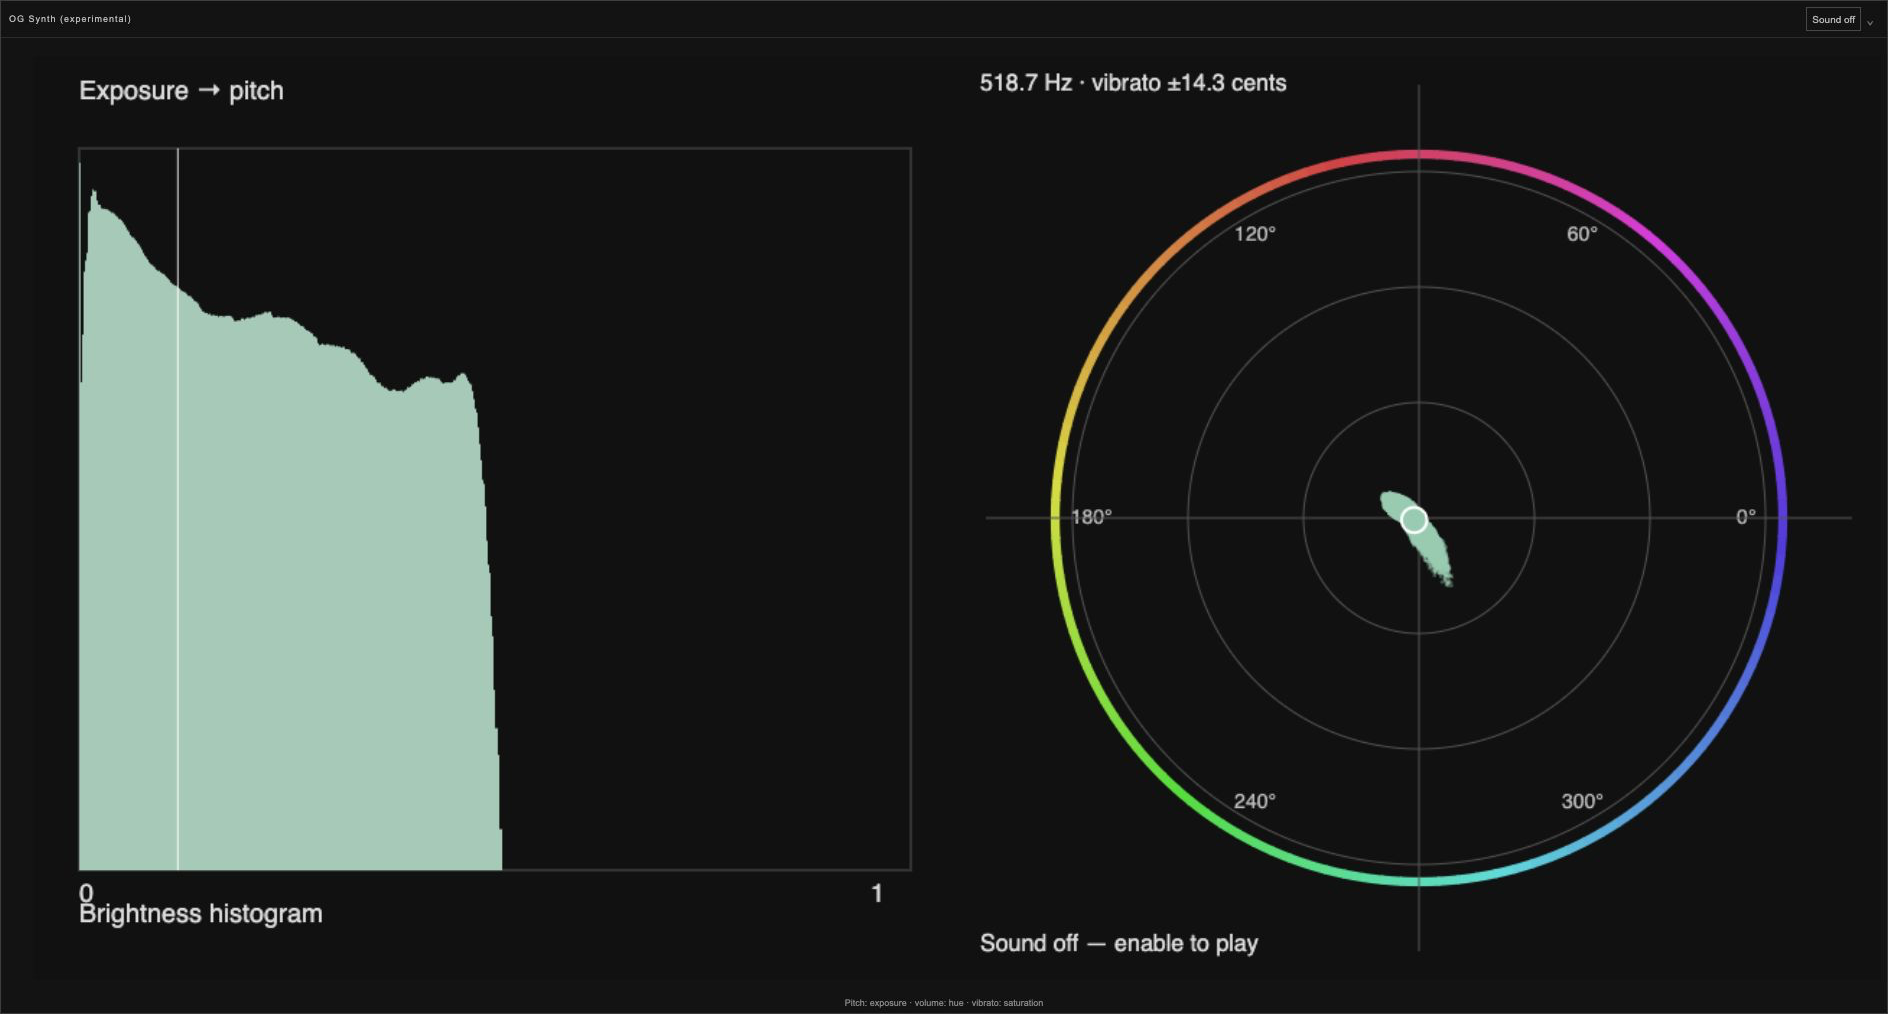
Play a soaring synthesizer lead with Resolve’s colour controls or moving footage. Select OG Synth (experimental), start listening, then enable Sound in its header. Exposure controls pitch, saturation adds vibrato, and hue controls volume. A brightness histogram and vectorscope show both sides of the performance. Under Settings → OG Synth (experimental), adjust pitch range, glide, vibrato, master volume and filter tone. The synth is experimental; its sound and controls may change.
Use an image region to measure one part of the picture. The rest of the image is left out of the scope readings.
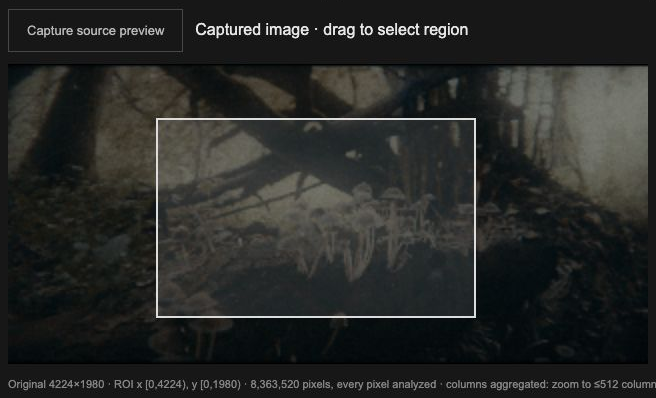
Limit the scope readings to a colour or a range of similar colours.
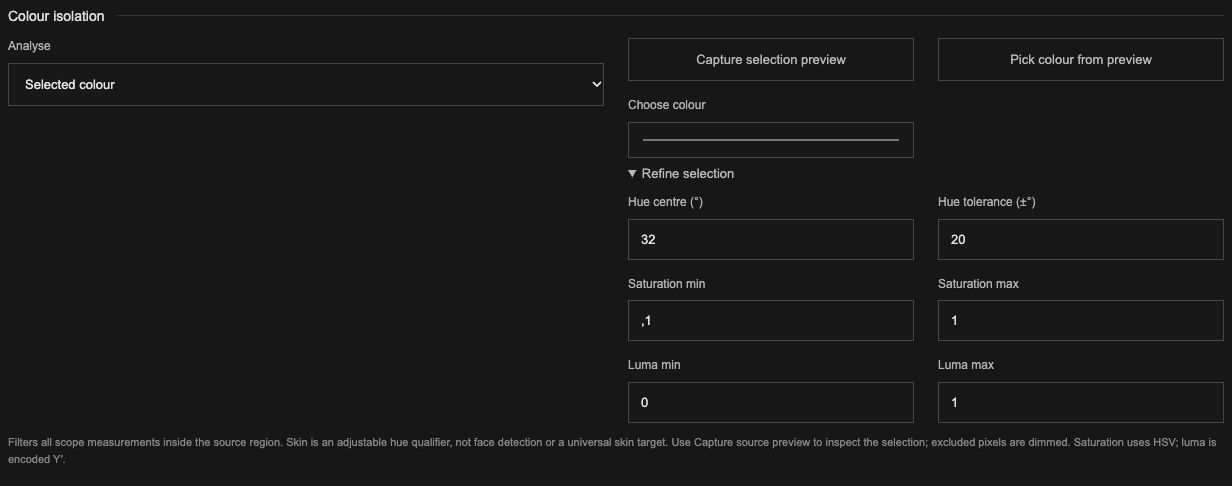
The selection applies to all scopes, inside your chosen image region. Skin hue range selects colours, not faces; adjust it for your subject and lighting.
Add Hue histogram to a scope slot, then open Settings → Hue histogram. The scope heading shows the active preset, such as Hue histogram · Shadows. Its filters affect this histogram only; the other scopes keep their usual readings.
Adjust Saturation minimum/maximum and Brightness minimum/maximum to refine the range. The presets are starting points: log footage and a display-transformed image can need different brightness limits. Exactly grey pixels have no hue and are excluded.
Pixel count gives every included pixel equal weight. Chroma-weighted gives stronger colour differences more influence, reducing the prominence of tiny casts and noise. Hue readings become less stable very close to grey or black, so compare both views when inspecting subtle colour.
To see which parts of the image are included, use Capture source preview under Region and measurement while the hue histogram is displayed. Excluded pixels are dimmed. The preview is a visual aid; it may not show the faintest differences measured by the histogram. A selected image area and any global colour isolation also narrow the histogram’s input.
Hue presets, custom ranges and weighting are included in saved settings. These controls require GTap 1.2.27 or later.
Parking assistance (PAS) adds sound to the scopes. Like a car’s parking sensors, it starts with slow pulses and speeds up as you approach a boundary. A continuous tone means you have reached it.
Turn on PAS in Controls. A square P appears in eligible scope headers. Tap one to choose the scope PAS follows; its P turns blue. Only one scope is assigned at a time. Tap the blue P to mute it, tap again to resume, or tap another scope’s P to move the assignment.
Open Settings → Parking assist (PAS). Highlights and shadows are on by default. Enable Saturation separately. Each assist has its own pitch and volume, and their sounds can play together.
Drag the labelled lines in the waveform editor, or enter exact values. Start is where slow beeps begin; Continuous is where they become a steady tone. Moving the lines closer together makes the sound change more quickly over a smaller range. The up/down arrows adjust the gap between these boundaries.
Signal limits and Grading limits keep two separate sets of highlight and shadow boundaries. Use one for signal endpoints and the other for limits chosen for your grade. Choose values that suit the signal reaching GTap; nominal SDR black and white are not universal limits for log, HDR or working-space RGB.
Affected area (%) sets how much of the analysed image must reach a boundary before it influences the warning. Increase it to ignore isolated bright or dark pixels. Set it to 0% for single-pixel sensitivity.
WARNING: Black borders count as dark pixels: crop them in Resolve or select an image area that excludes them.

The inner circle marks the start of the warning; the outer circle marks the continuous tone. They measure distance from the grey centre of the vectorscope. This is signal chroma strength, not a perceptually uniform saturation percentage.
Saturation follows the whole image by default. Capturing a preview is optional; select an image area if you want to monitor only that part. On a shadows, midtones or highlights vectorscope, PAS follows that scope’s tonal band.
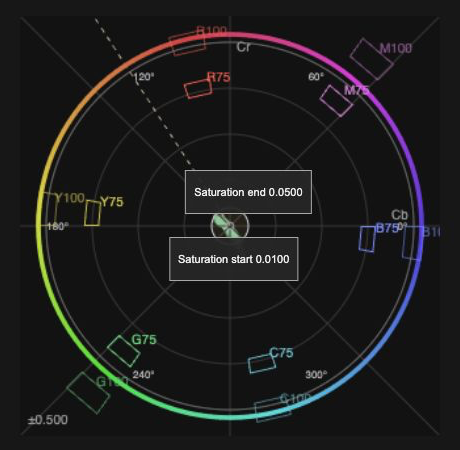
Pause on the frame you want to use as a starting point, then choose Fit limits to current image. This sets the highlight, shadow and saturation start boundaries from that image using your affected-area settings. It keeps the existing gaps to the continuous-tone boundaries. Review the result and adjust the limits for the shot.
PAS settings and the image-area selection are saved with your setup. Zoom, Q detail, Smooth, Gain and trace Brightness change how the trace looks; they do not change PAS thresholds. After loading the page, tap PAS in Controls if the browser needs permission to start sound. Stop listening or turn PAS off to silence all assists. PAS is suspended while OG is present and resumes when OG is removed.
Keep a scope trace as a reference while you adjust the grade. The reference appears over the live trace so you can compare them.
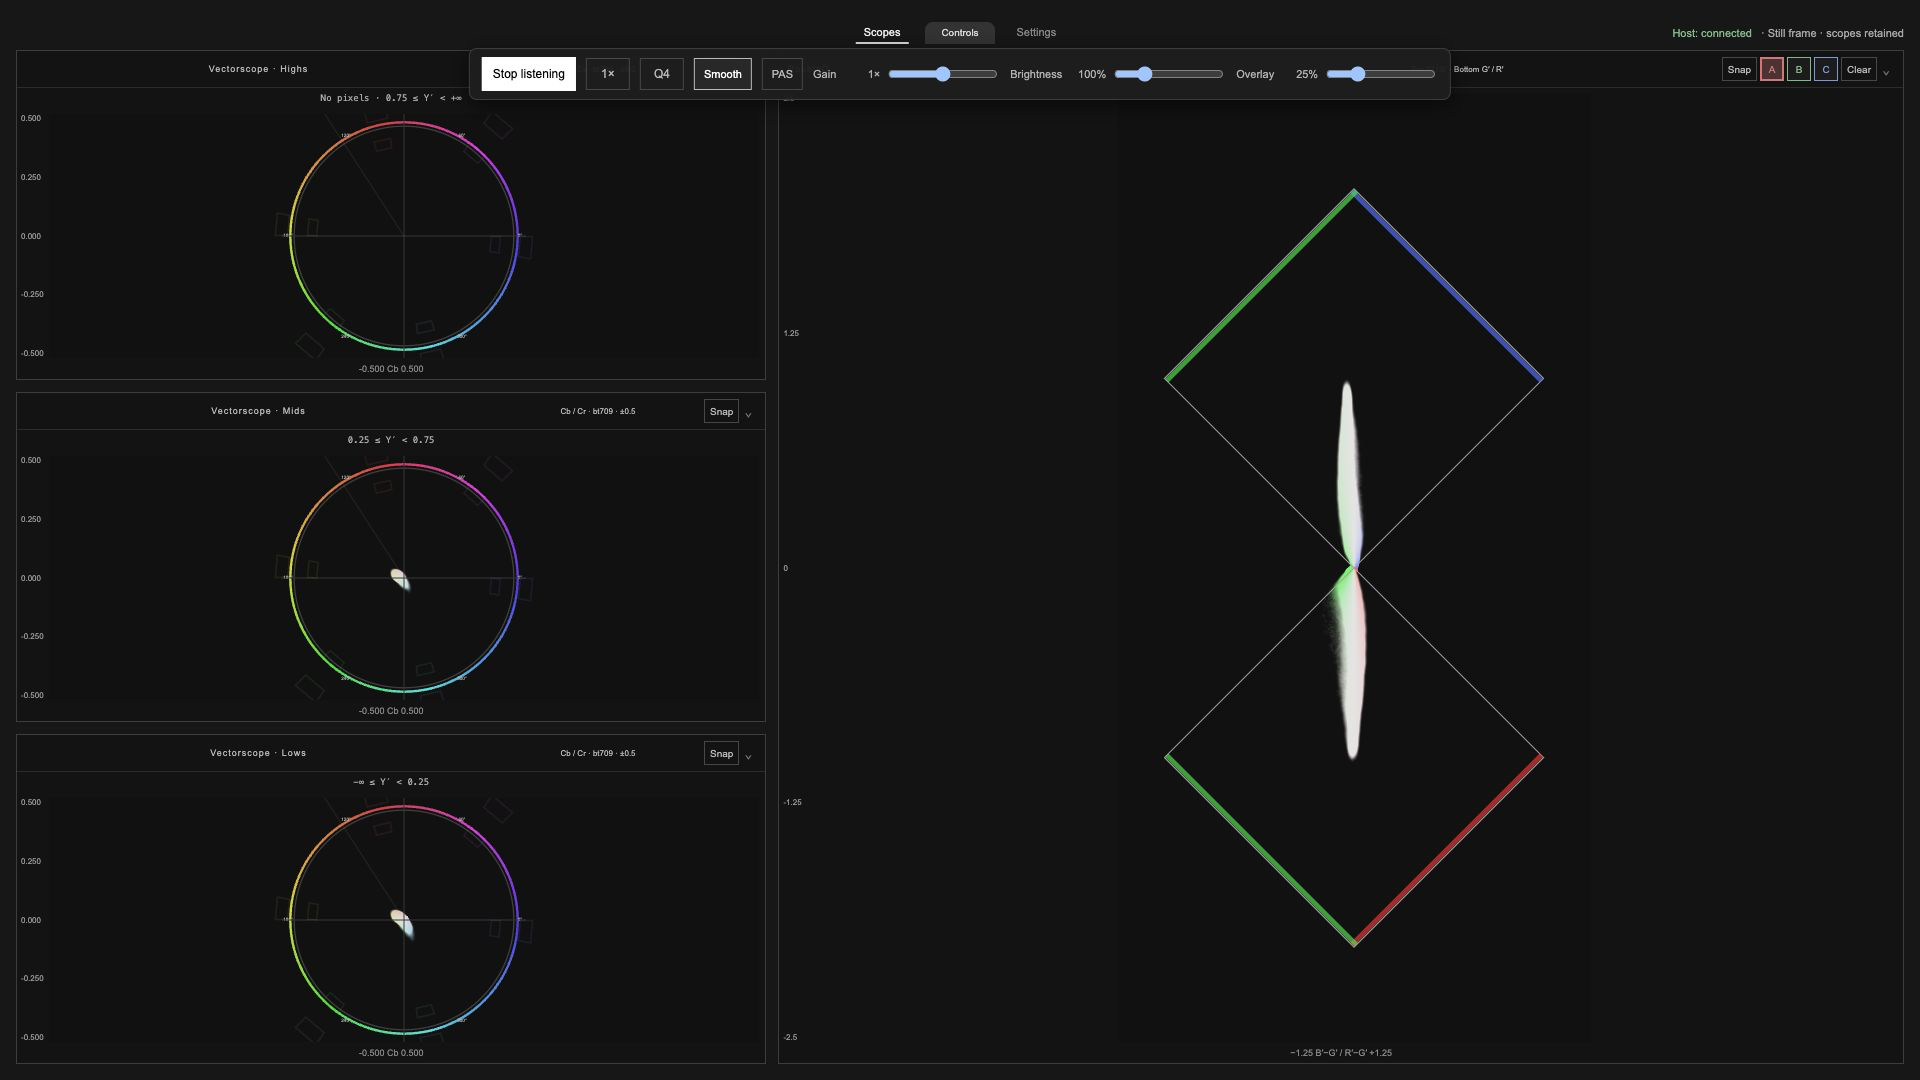
Each scope keeps three references. A fourth capture replaces the oldest. A reference with an incompatible range or colour space is hidden until the settings match.
References stay in that browser on that device and are separate from settings files. Clearing browser data can remove them.
The viewer remembers your settings in the current browser. Use Save settings to save a settings file, and Load settings to open one on another device. On phones and tablets, the browser may put saved files in Downloads; use the Files app or browser download menu to find them.
Reset to defaults restores the starting setup. Settings files do not include saved A/B/C scope references.
Quality changes the display resolution of the plots. Auto is a good starting point; lowering it can help a slower device. It does not change the chosen image region. Keep Debug off for normal use.
Check that the host is still running on the Mac and both devices are on the same local network. Use the current address in GTap’s panel. Allow incoming local connections if the Mac firewall asks. Guest Wi-Fi, a VPN or network isolation can prevent devices from reaching each other.
Tap Start listening. Check that GTap is enabled on a node in the current clip and the panel says the host is connected. Play, scrub or change a grade to send a frame. Check that the scope is not Off and that a colour selection or small region is not excluding the picture.
Check GTap’s node position, declared input primaries and the viewer’s level range. A transform after GTap will not appear in the measurements. Reset the image region and colour selection to include the whole image.
Try fewer scopes, a lower display Quality and a stronger local network connection. Source-coloured waveforms can be demanding. Update speed depends on the picture, Mac, browser and receiving device.
Quit Resolve, rerun the installer and check its result. Reopen Resolve and check the Effects library. If macOS blocks the effect, review the message in Privacy & Security. Use the GTap supplied with the same release as your viewer.
Browsers can limit keeping the display awake and fullscreen. Check the device’s auto-lock setting.
For a problem report, include your Mac and device models, OS and browser versions, Resolve version and what you were doing. Report an issue on GitHub.
Galaxy Scopez and GTap are made by Vidar Andersen. Background · Source code
The project’s original code, documentation and supplied header artwork are offered under Creative Commons Attribution–NonCommercial–ShareAlike 4.0 International (CC BY-NC-SA 4.0), to the extent the author holds the rights. Credit Vidar Andersen, link the licence and state any changes. Commercial use is not permitted by this licence. Share adaptations under the same licence. See the full licence for the terms.
Third-party components keep their own licences:
Read the full third-party notices. Node.js is bundled with the Mac application, under its own licence and notices. DaVinci Resolve (proprietary; licence supplied with the application), macOS (software licences) and Apple frameworks (developer terms) are separately licensed products; they are not included in this download. This project is not affiliated with or endorsed by Blackmagic Design or Apple.
Header artwork supplied by the tears of real artist. Web versions resized and converted with Pillow (HPND licence) and libwebp (BSD 3-Clause). Coding assistance: OpenAI Codex, a proprietary service (terms). Python (PSF licence), NumPy (BSD 3-Clause) and tifffile (BSD 3-Clause) were also used for validation. These tools are not included in the application download.
The teaser’s glass button uses Amazing Glass by Ivan Tomac (MIT licence), adapted from the Lens Debaser header.